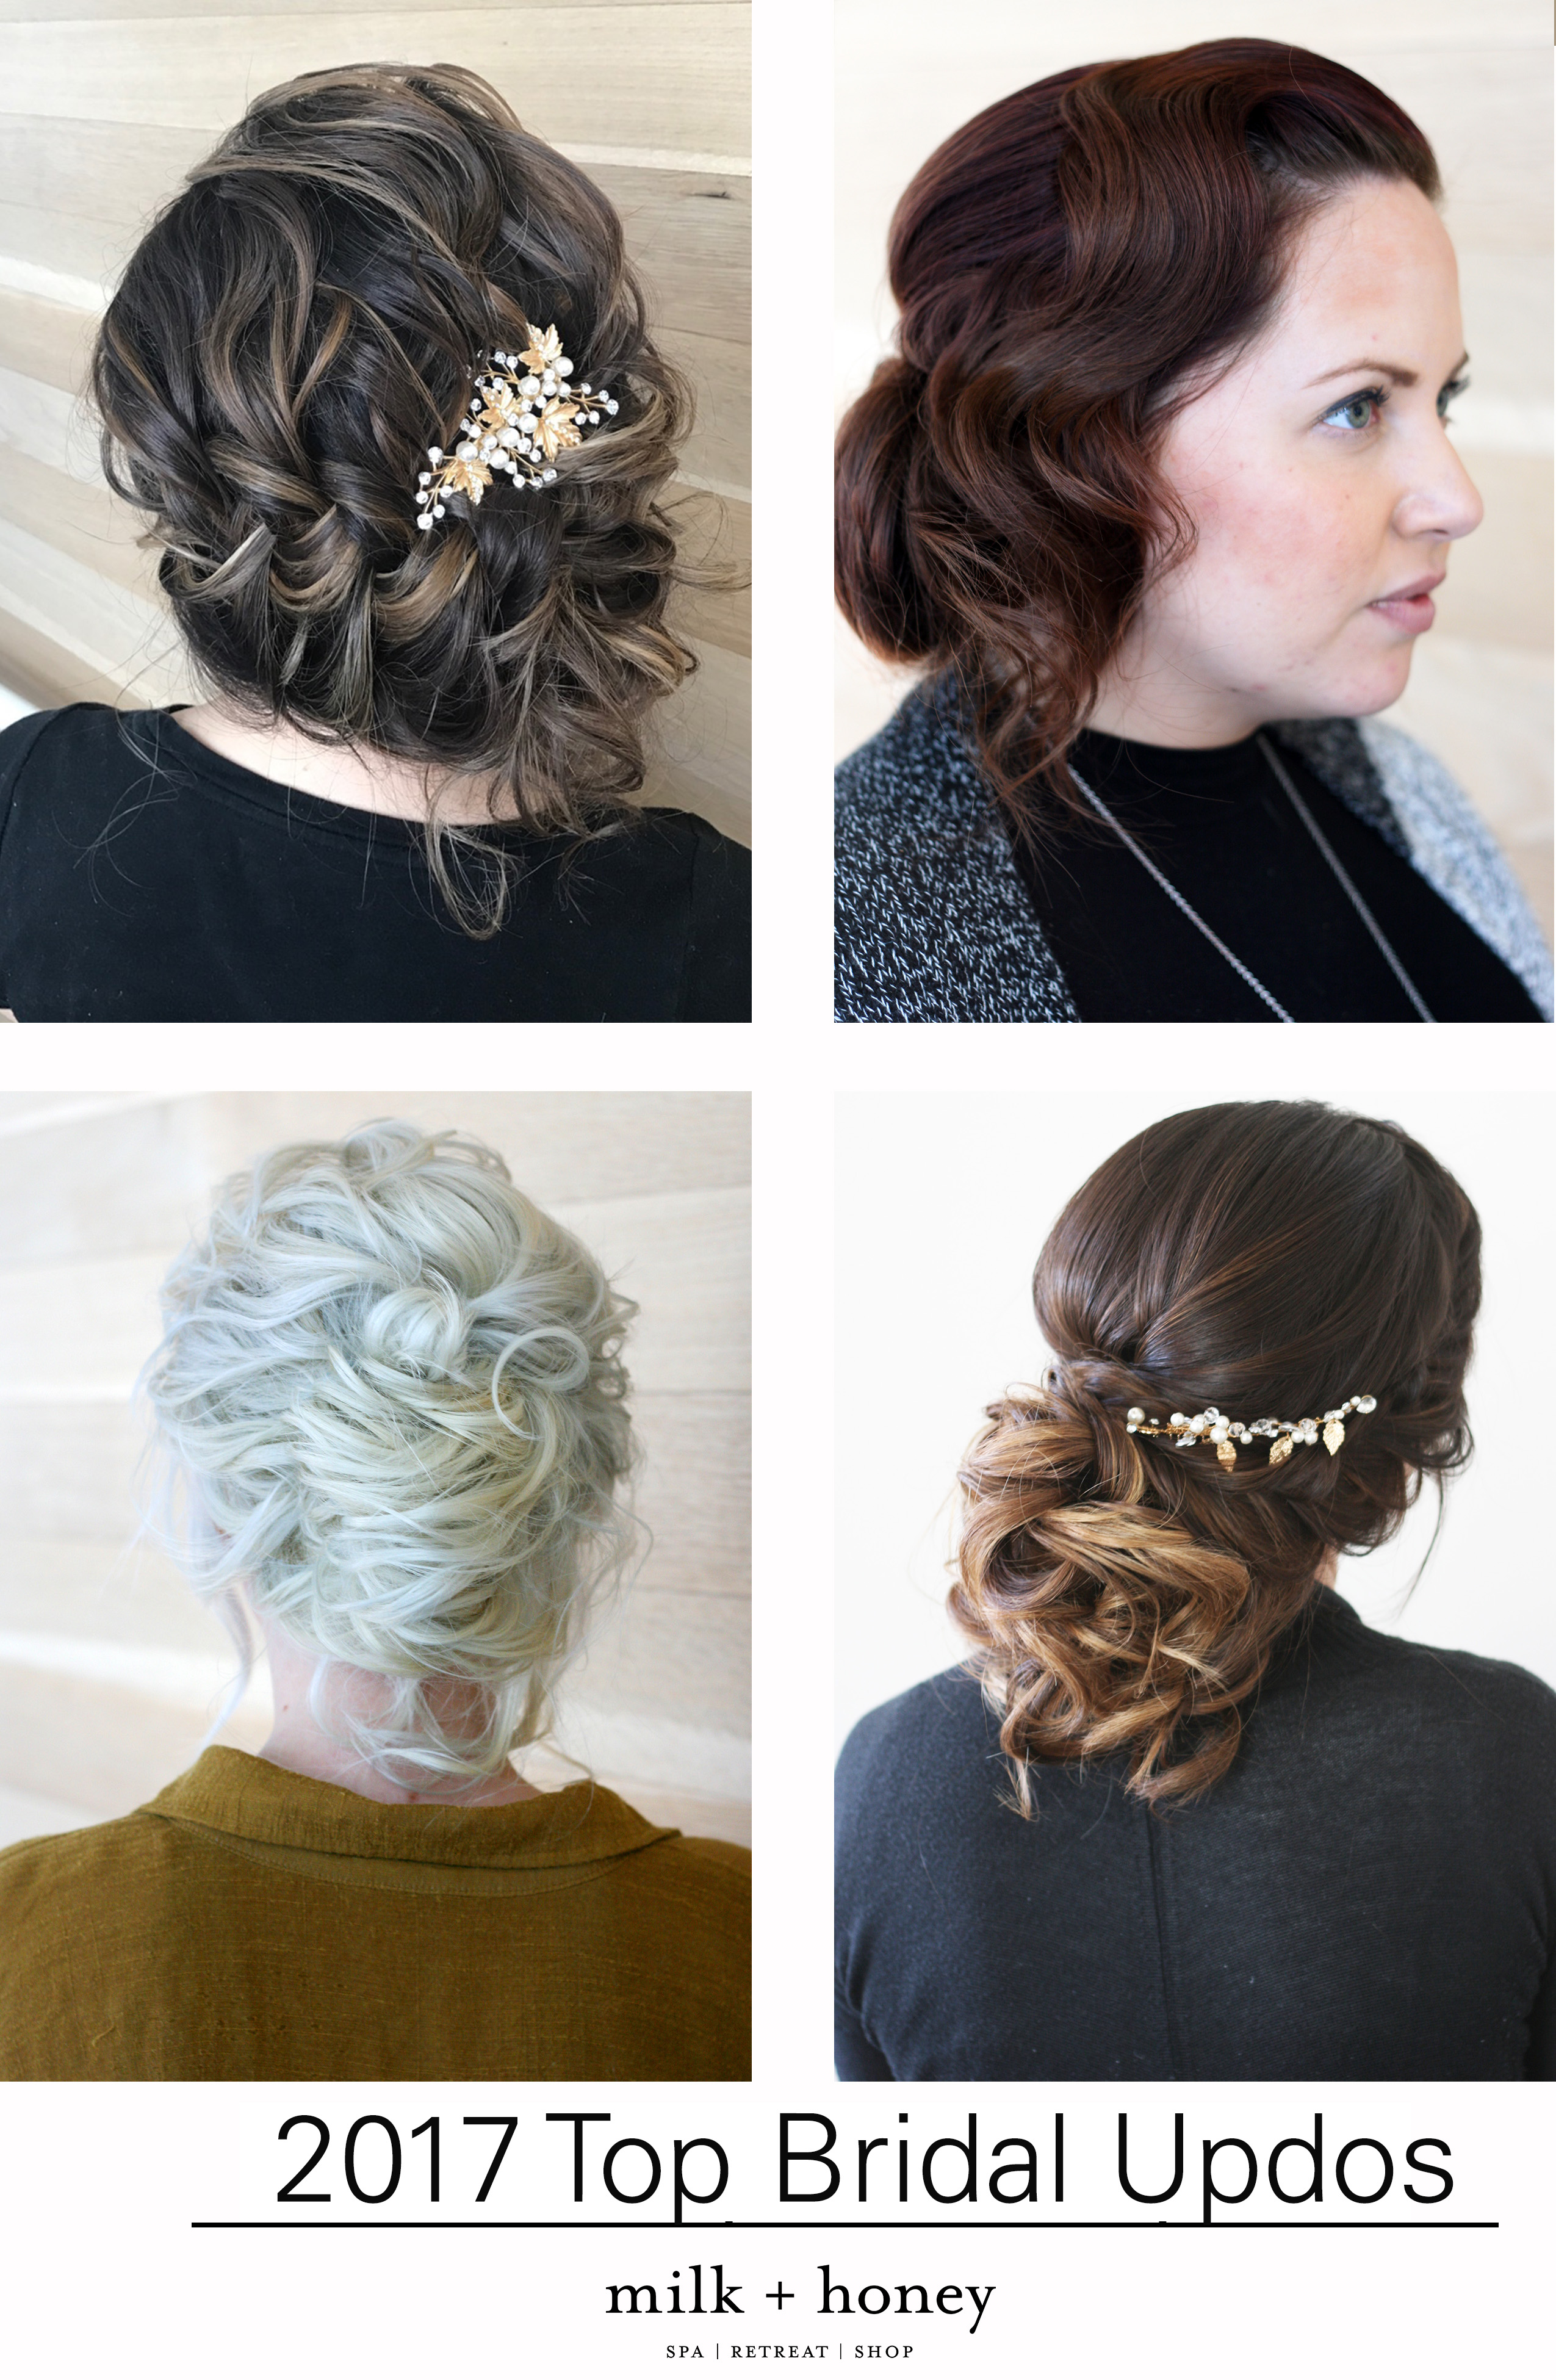
Wedding season is almost here! To help you achieve your ideal look for the big day, our stylists were shown a whole new set of tips and tricks from bridal hair guru, Stephanie Brinkerhoff about this season’s top looks. From braids to retro updos, these four styles are sure to compliment any blushing bride.
The Braided Bun
We’re adding some bling to this classic bridal bun. Stephanie began by crimping the model’s hair for more volume, and after sectioning it, she began to curl her hair with a 1″ inch curling iron. After curling, she secured a small bun on the nape of the neck with bobby pins, then began wrapping and pinning fuller pieces. Stephanie left the model’s bangs out to create the loose fishtail braid. After securing the braid, she added some hair jewelry.
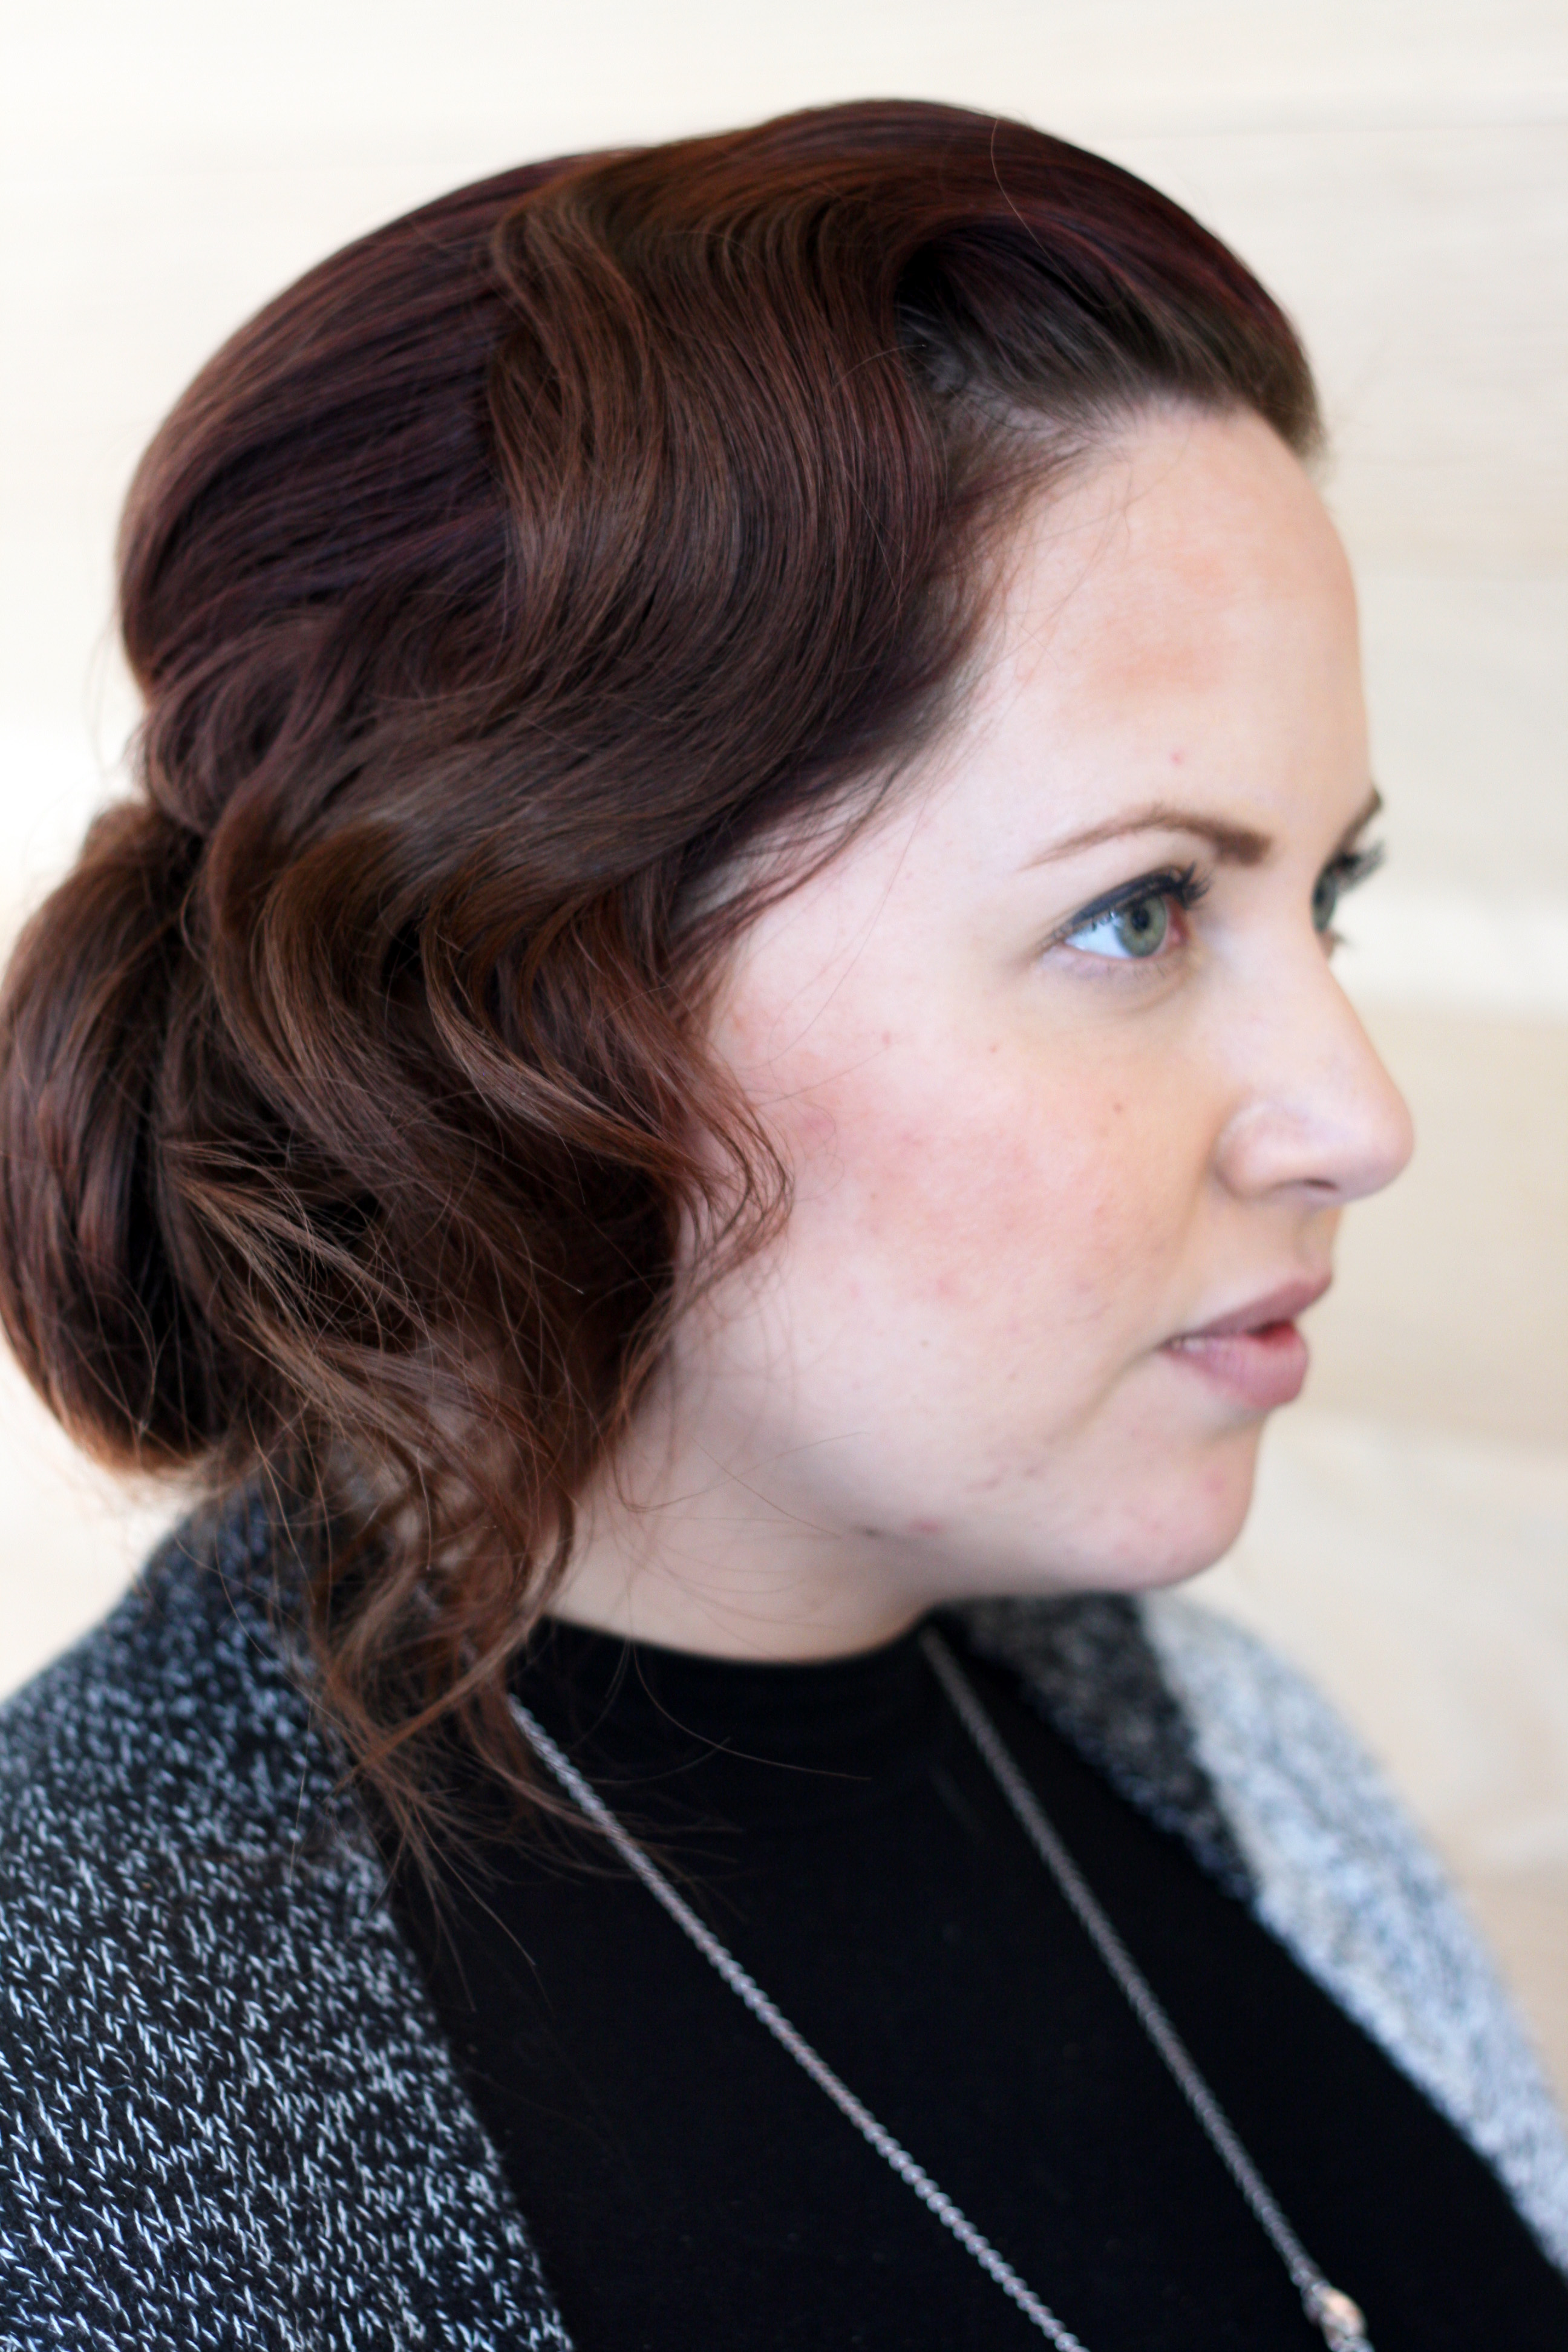
The Side-Swept Updo

Get swept away with this romantic updo. Stephanie starts by sectioning the hair into three pieces. At the nape of the neck, she created loose waves with a 1″ inch flat iron. Throughout the hair, Stephanie created a more defined wave by wrapping the model’s hair around a 1″ inch wand. After creating the wave, she ran her hand through the curls before applying hairspray. At the crown, Stephanie backcombed at the root, coated the section with hairspray before waving the hair. After creating face-framing pieces with the wand, Stephanie went back with a flat iron to loosen the curl. With the front section, she backcombed the hair before waving the hair with her flat iron. Stephanie created a loose side braid and tucked the end of the braid under the right side. To give the braid fullness, she gently pulled it apart. Stephanie finished the look by adding some hair jewelry.
The Classic French Twist

Some looks never go out of style. Case in point: this classic French Twist. Stephanie started by sectioning of the model’s hair into three sections. Then, starting at the back of the hair, she used a 1″ inch flat iron to create loose waves. After each wave, she backcombed the roots and then applied hairspray. Once she finished waving the hair, Stephanie created the base of this updo by vertically rolling the hair from right to left and securing it with bobby pins. Next, she began repeating the wave process on the middle section. Utilizing bobby pins, Stephanie individually secured pieces of hair on top of the updo. For the top section, Stephanie loosely straightened and waved pieces of the model’s hair with a flat iron.
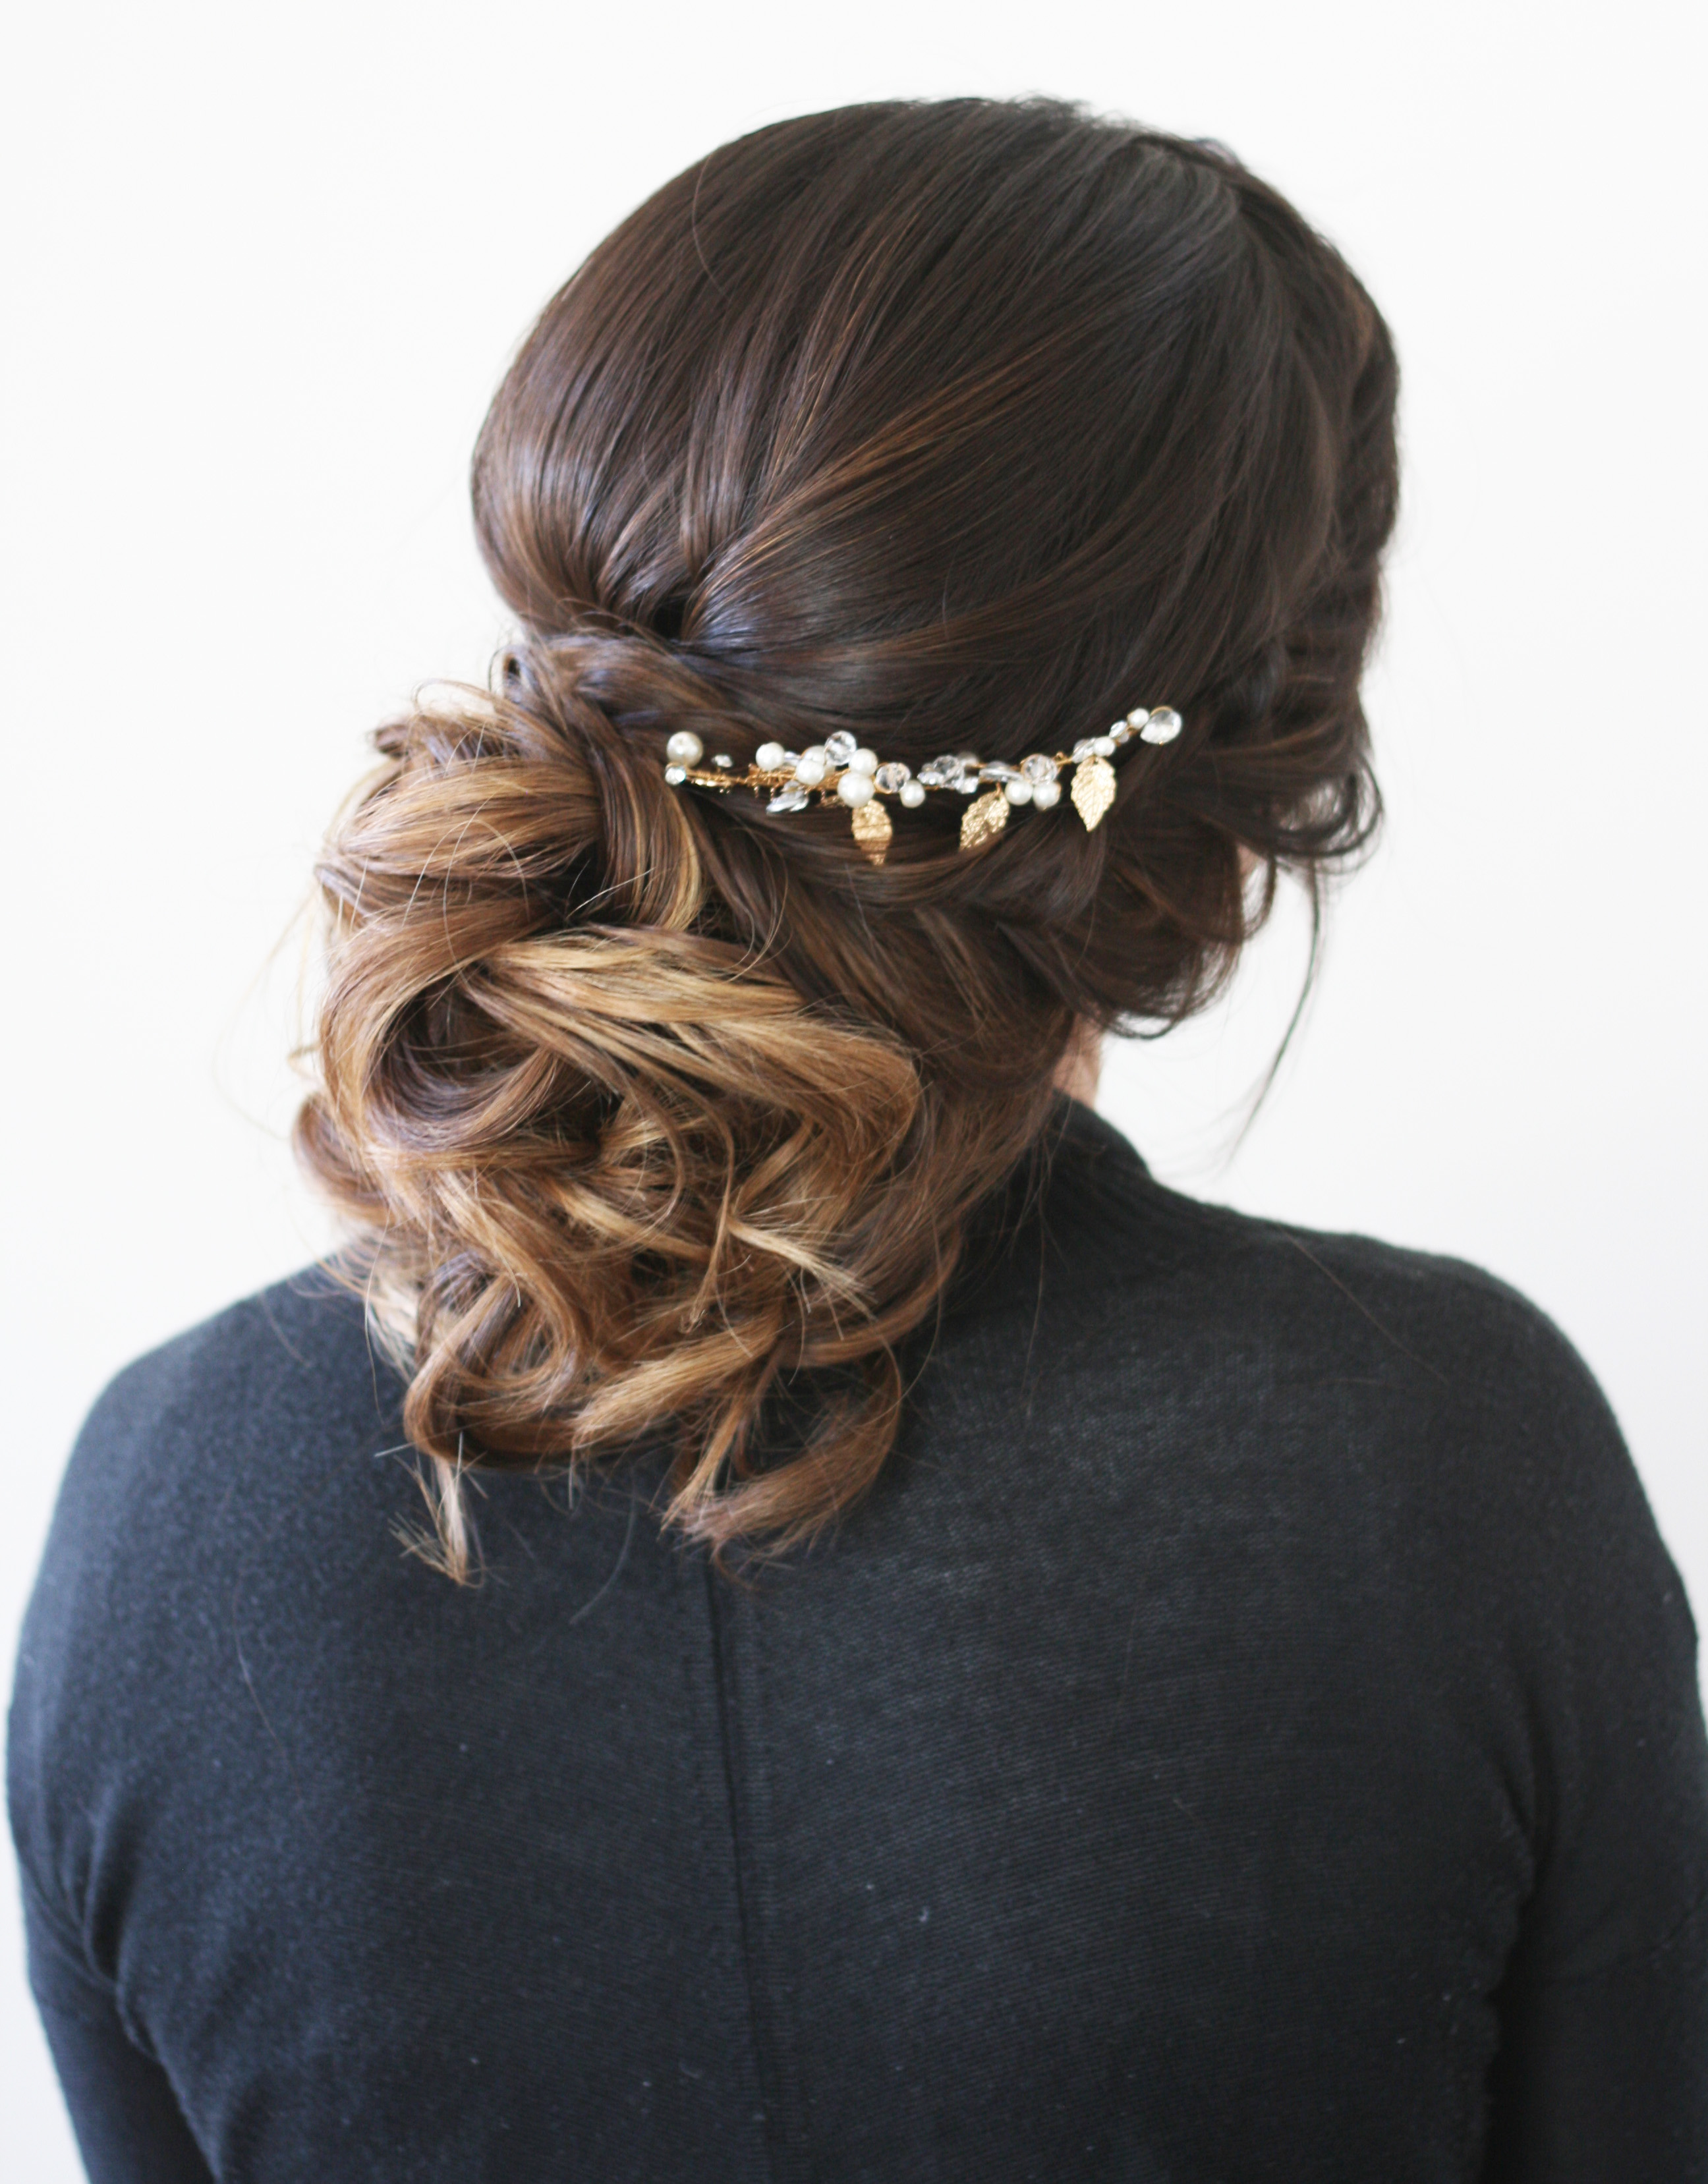
The Retro Updo
Retro brides will love this look. Similar to the first look, Stephanie started by creating a small low bun. Next, she curled the larger pieces, with a 1″ curling iron and secured them into the bun. After securing the hair, she sprayed the back with hairspray to set the look. To create the detail finger wave, Stephanie started by parting the front of the hair. Working in small sections, Stephanie began creating her wave pattern. Starting the front, she utilized a 1″ inch wand to create this vintage S-Wave. To exaggerate this pattern, she gathered the sections of hair and placed bobby pins at the top, temple, and by the model’s ear. After applying hairspray on the front, this updo was complete.
No Comments